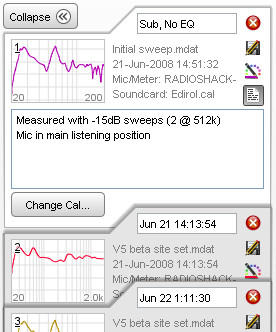
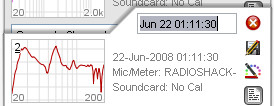
The Measurements Panel shows the measurements which have been made or loaded and information about them. The tabs on the panel are used to select individual measurements, they include a thumbnail of the frequency response. The text next to the thumbnail shows the name of the file the measurement was loaded from or has been saved to (if it has been saved), the date and time the measurement was made and the mic/meter and soundcard calibration files that were used (hover the mouse over that text area to bring up a tooltip that shows the full text width). The order of the measurements in the list can be changed by clicking on the currently selected measurement and dragging it up or down to a new position in the list.
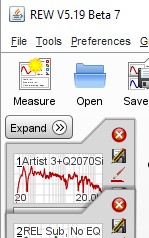
The measurement panel can be made narrower to provide more screen area for the graph, click the Collapse button to narrow the panel.

Measurements can be disabled or enabled by right clicking on the measurement's thumbnail. Disabled measurements cannot be selected, are skipped when using the next/previous measurement shortcuts (Alt+up/down and Ctrl+up/down) and are not shown in the legends of overlay graphs. All measurements can be re-enabled via an entry in the right-click menu of graph legends or using the Ctrl+E shortcut. All selected or all unselected measurements can be disabled via entries in the right-click menu of overlay graph legends. The Ctrl+D shortcut disables the currently selected measurement.
Measurements can be locked or unlocked by right clicking on the measurement's thumbnail. Locked measurements cannot be deleted, the delete button icon is replaced by a padlock. All measurements can be unlocked via an entry in the right-click menu of graph legends or using the Ctrl+U shortcut. All selected measurements can be locked via an entry in the right-click menu of overlay graph legends. The Ctrl+L shortcut locks the currently selected measurement.
A measurement can be swapped with the first measurement in the list by right clicking on the measurement's thumbnail
The measurement actions panel can be shown by right clicking on a measurement's thumbnail and selecting "Show actions".
The text box at the top of the measurement panel is used to change the name of the measurement. The length of the name is limited to the width of the box. If a blank name is entered, "No Description" is used. The name is shown in blue for new measurements or measurements with unsaved changes, otherwise it is black.
The buttons in the column next to the name box are used to delete the measurement (deleting a measurement removes it from REW, saved measurement files are not affected), save the measurement, set the trace colour and expand or collapse the notes area. Trace colours can be reset to their defaults in the View Preferences.
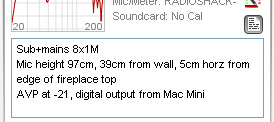
Notes relating to each measurement can be entered in the notes area, they are saved with the measurement. Right-clicking in the notes area brings up a Cut/Copy/Paste menu.
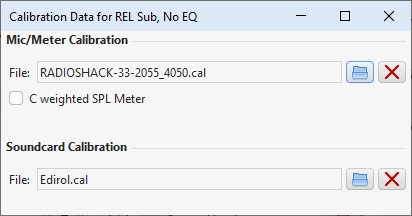
The Change Cal button brings up a dialog to load, update or clear the calibration data files for the mic/meter or soundcard or to select whether a C-weighted SPL meter was used for the measurement. Note that changing the calibration data or C-weighted setting will clear any waterfall, decay or spectrogram plots that have been generated as they would no longer show valid data. Other affected plots will be regenerated using the new cal data.